Publish on Screens
View current bookings
There are three different views for managing your bookings.
All views show your available screens on the left side. When selecting a
screen, you will see all bookings on that screen in the calendar.
If you cannot see any screens then you should contact your administrator
for help, since you are probably missing some permissions for the
screens in question.
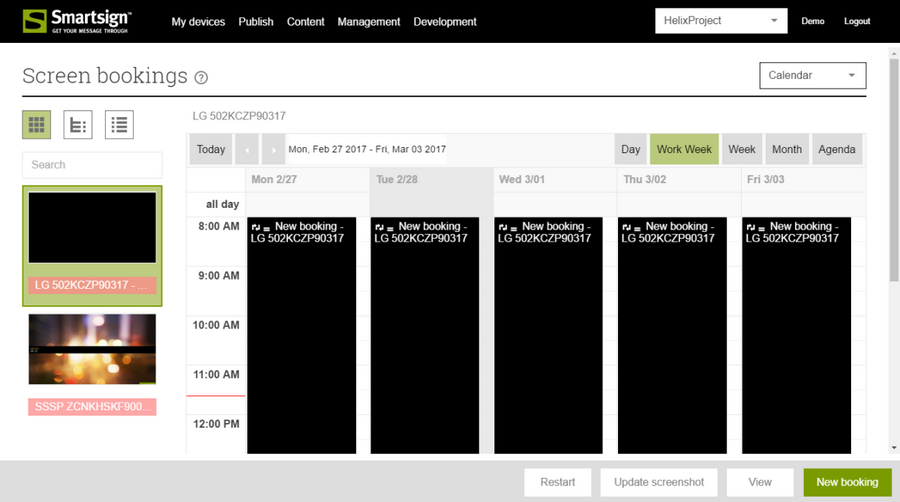
Calendar
This is the normal view that provides access to all features. Here you can see and create bookings without limitations.
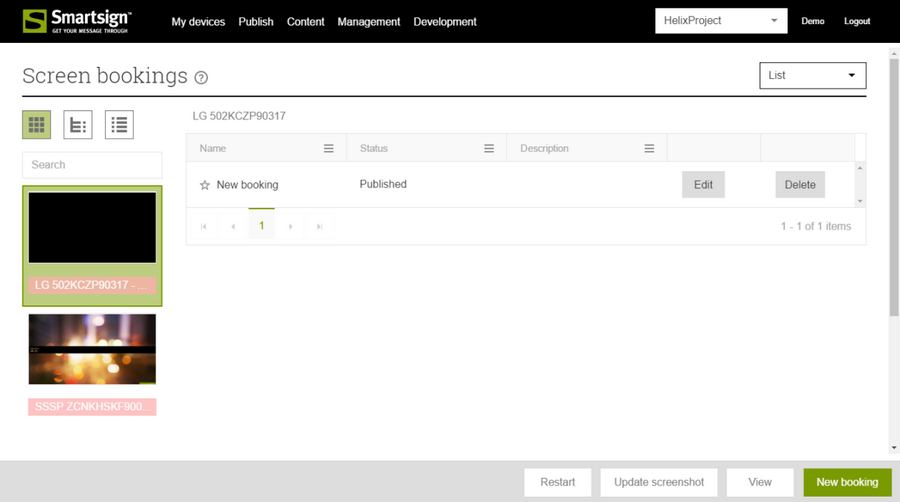
List
The List view will show all your bookings in a list. This view can also be used to find bookings that have no screen selected. By choosing the list view and not selecting any screen. All bookings will show.
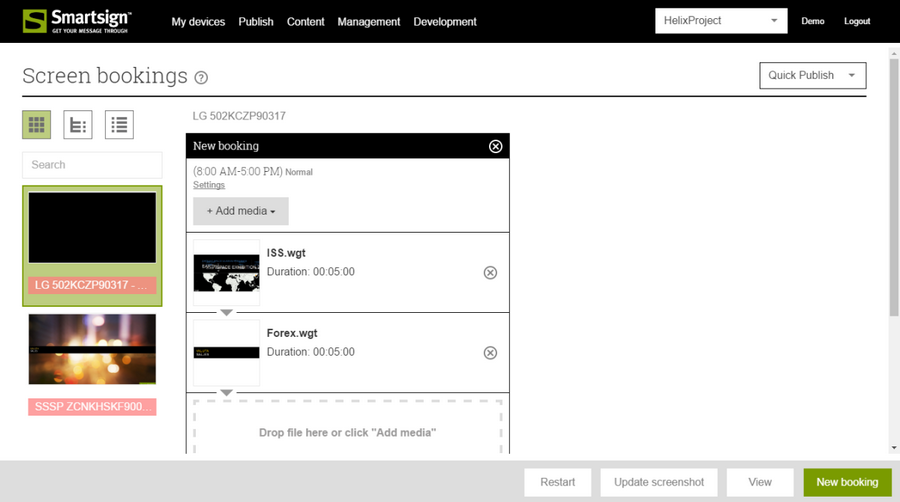
Quick Publish
The Quick Publish view is a simpler view that uses "booking cards" for managing bookings. The booking cards have a limited set of options. They can only be recurring weekly on selected days, with a start time, and end time and priority. It is possible to manage the content of previously created calendar bookings here as well, but due to the intentionally limited feature set of the booking cards many of the more advanced features cannot be utilized.
Create a new booking using the Calendar view
Press the button "New booking" to start a 4-step guide which will assist you in creating your new booking.
Choose Screens
Select one or more screens where you want your booking to play by
clicking on them. You can use the search field to filter which screens
you see. There are 3 different views available.
Once you have chosen the screens you want to publish to. Click Next in
the action bar to proceed (Back and Next are used to navigate between
the different steps in the booking wizard).
Simple view
The simple view only deals with the main area on the screen, the primary layer. On a full screen layout this is the only layer available.

Tree view
The tree view shows the screens in a tree structure. This structure can be managed by you using the tree view under "My devices". In the tree view you must choose which layer on the screen that you want to book and then you can select from all screens which have a layout that includes the chosen layer. This means that you can control screens with different layout using the same booking.

Advanced view
The advanced view focuses on the layout of the screens. Here you must choose a layer within a specific layout and then select from the screens using that layout.

Tag Filter view
The tag filter view focuses on the tags of the screens. Here you must choose a tag filter and create a booking and it will be added to all the screen with that specific tag. You need to create tags and tag filters before creating any tag filter bookings.


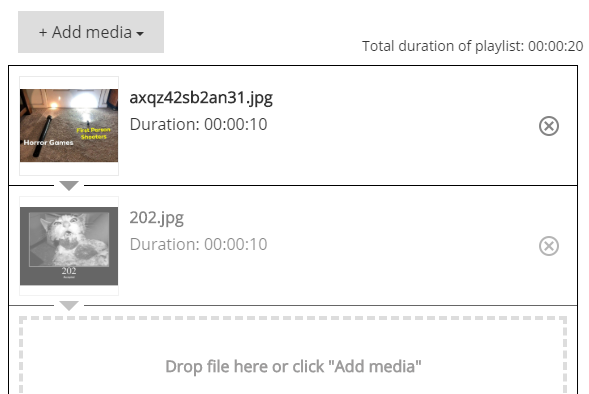
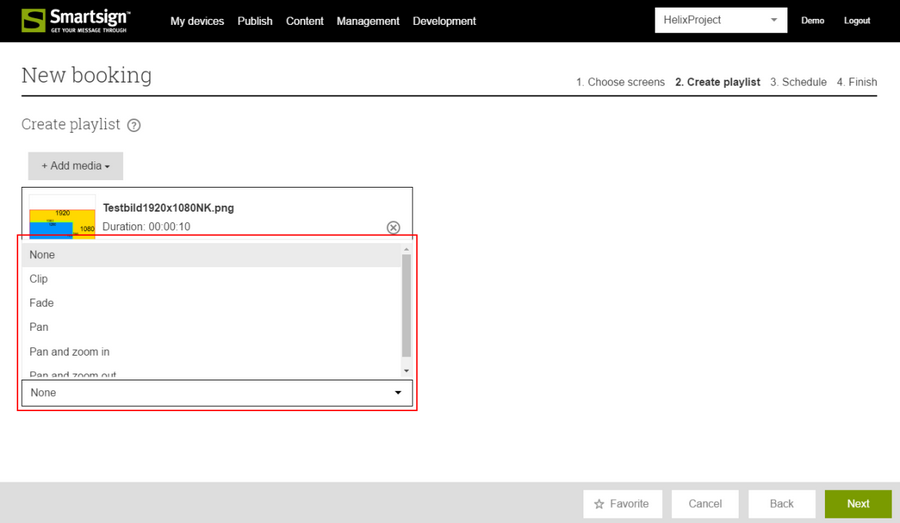
Playlist
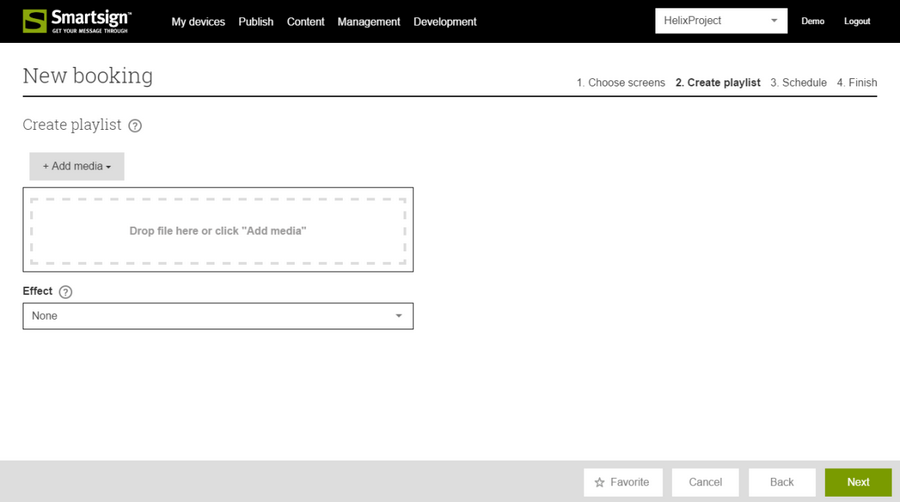
Press the button "Add media" to select the media you wish to display on
your screens. After you have added your media click the Next button.
We recommend that you upload your media to Smartsign Media Library
before creating bookings so that you can reuse the same media in
multiple bookings. You will also be able to update the media without
recreating the booking if you utilize the library.
+Add media
Upload files
This is similar to drag and drop and allows you to upload files from your computer directly to the booking. You will be presented with a dialog where you can choose which files to upload.
Add URL
This will prompt you to enter a URL.

Add video stream
This will prompt you to enter the URL to a video stream. The URL must be on a network which is accessible to the player/screen.

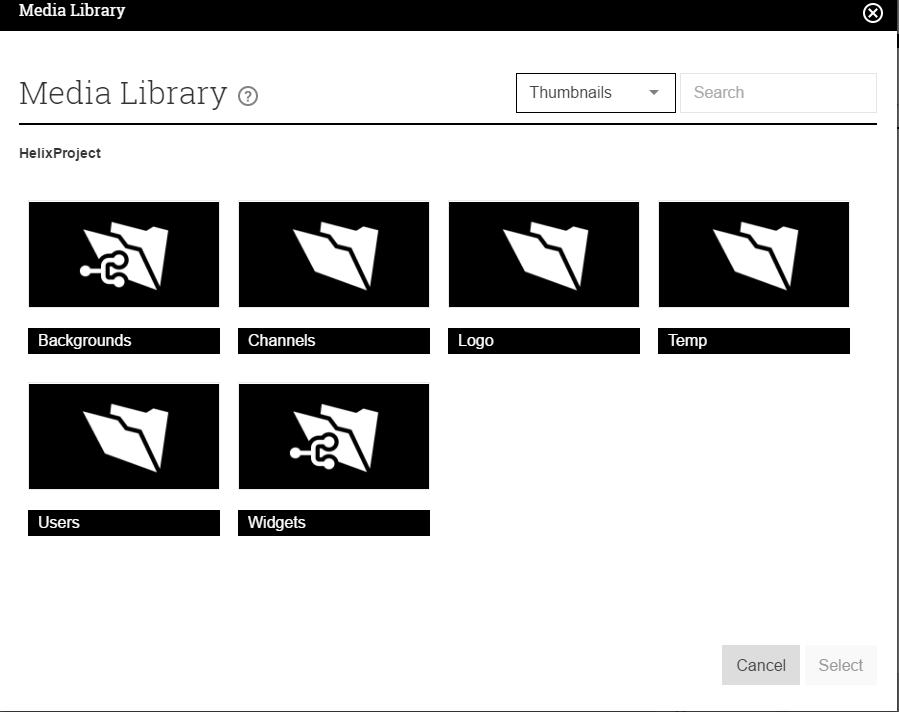
Media Library
Shows a dialog allowing you to select from previously uploaded media in the Media library. You can choose either individual files or a complete folder. If you choose a folder, the files in it will play in alphabetical order.
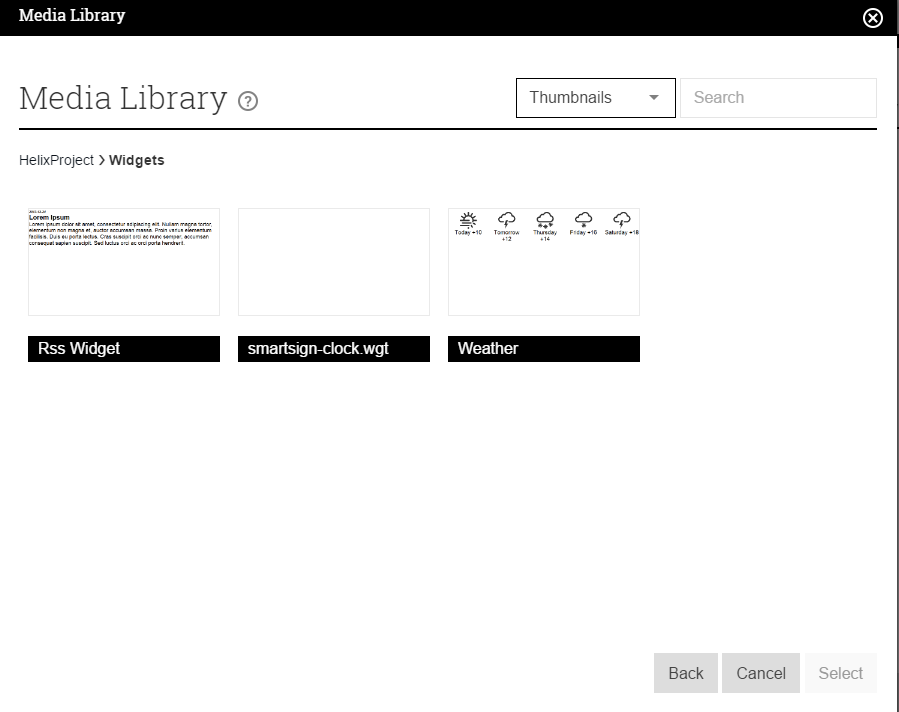
Templates
Shows a dialog allowing you to choose from available templates/widgets. When you have added a widget to the playlist you may configure it by selecting it and clicking Edit in the detail view on the right-hand side.
If you have chosen a layer which is profiled as RSS, you may also see the following options.
Add RSS
This will prompt you to enter a URL to an RSS feed. Once entered, an RSS template will be automatically added to your playlist. To customize the showing of the RSS you can proceed to select the template and clicking Edit in the right-hand detail view.
Media validity
Media that is no longer valid will remain in the playlist until it's removed manually. From version 10.7 it will show as grayed out in the playlist. It will also be grayed out when viewed in the media library.
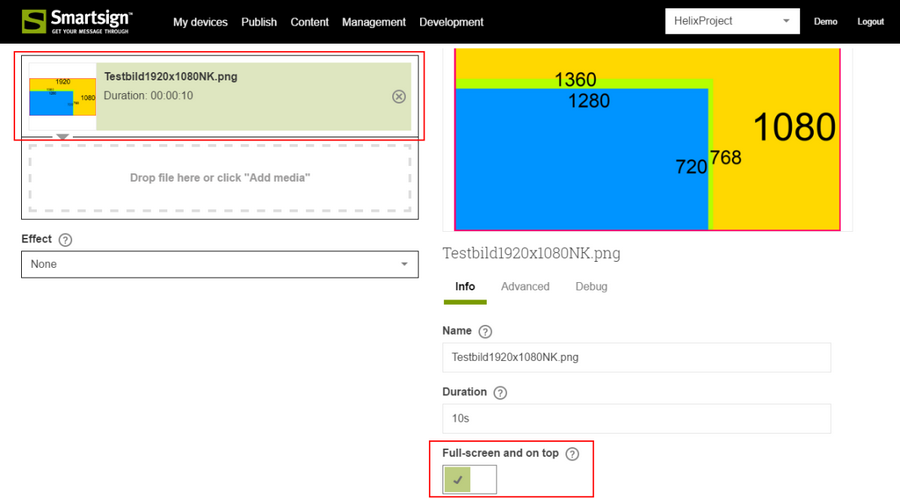
Show a media item in full screen
If you want to display a media item in full screen instead of the just within the chosen layer, select the item in the playlist and then enable the setting "Full-screen and on top" in the right-hand detail view. Please note that if your layout is already full screen, there is no need to change this setting.
Effect
Please note that rendered effects are deprecated in it's current form and will be removed. Modern players are now able to fade live without any additional configuration and other effects can be achieved using templates.
Media bookings with images and video can be converted to video allowing you to add transitions. This will only be performed if you choose to add an effect to the playlist, ex: Fade, Clip, Pan, Zoom in and Zoom out. This conversion is very resource intensive and can take anything from a few minutes to hours to complete. The screens will show the original media until the video creation has completed.
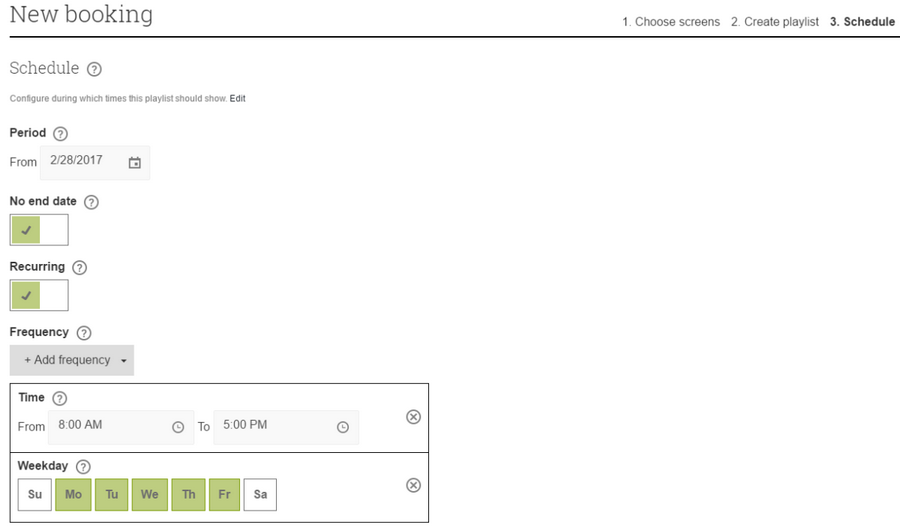
Schedule
In this step, you can configure the date and times that your booking should show on screen. By default, you start with a recurring booking starting today, with no end date, showing between 0800 AM to 0500 PM on work days (Mon – Fri). To create a non-recurring booking, please disable "Recurring" by clicking the control. The booking is now non-recurring which means it runs 24/7 from the start date/time to the end date/time. If you wish to set an end date, click the "No end date" control and an option will be available to set an end date and time as well.
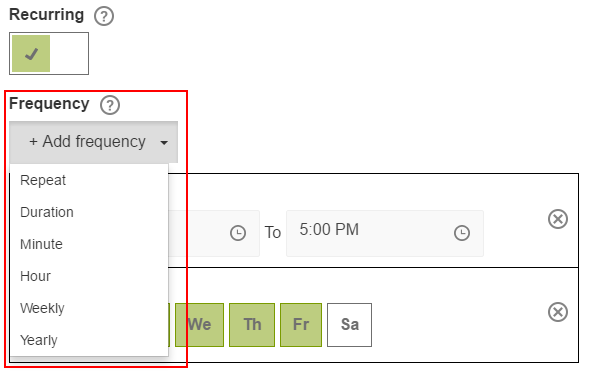
Frequencies (recurrence)
You can add additional conditions to a recurring booking by using the button labeled Add Frequency.Frequencies allow you to add conditions to your schedule. An example: by choosing the frequency Weekday in month the booking will display on your screens on your chosen day of the month. If a frequency contradicts one already chosen it will be removed from the drop down menu so to see all available frequencies, you should remove any frequency already chosen.
Publish
In the final step, you will get a short summary of the booking you are about to create. If you find everything to your liking, press the button "Finish" in the action bar and your booking will be sent to the calendar.
-
Name – Give your booking a name so that you can identify it easily
-
Description – Use this field to add an extra description as desired
-
Priority – This sets the priority of the booking. There are 4 different priorities: Low, Normal, High and Urgent. The Urgent priority is normally reserved for the system admin. If you have more than one booking of the same priority, they will all be shown one after the other. If there is a booking with higher priority it will always override any bookings with lower priority, meaning only the higher priority booking will show.
-
Status – This is the status of the booking. If the booking is published it will be shown on screen. If it's inactive it remains in the system, but it will not be shown on screens.
-
Color – This field allows you to select a color to highlight the booking in the calendar. This allows you to color code bookings so that you can find them easier.
-
Preview – The preview button allows you to preview the current booking before saving it

Edit an existing booking
Choose a screen/layer using the views as described above when creating a
booking. All bookings on that screen/layer will now show in the view you
have chosen. Highlight the booking by clicking on it and then click
"Edit" in the action bar.
Change the booking as desired and then save it by going to the summary
page (4. Finish) and clicking "Finish" in the action bar.