Installation
Initial setup (unpacking new display)
When you turn on your screen for the first time you must complete a setup guide. It can vary between models so the below steps and their order may not be exact.
- Select language
- Select Skip if asked to add a Google account
- Accept the terms of service
- Permit Google to use the devices location, No recommended
- Send diagnostic information to Google, No recommended
- Scroll down and agree to the privacy policy
- Select the screens position, wall or table
- Apple AirPlay and HomeKit, select Next
Optimize for Signage use
- In the list of Apps, select One Step Setting
- Select one of the Signage profiles.
Either Signage Use or Standard Signage is usually preferred.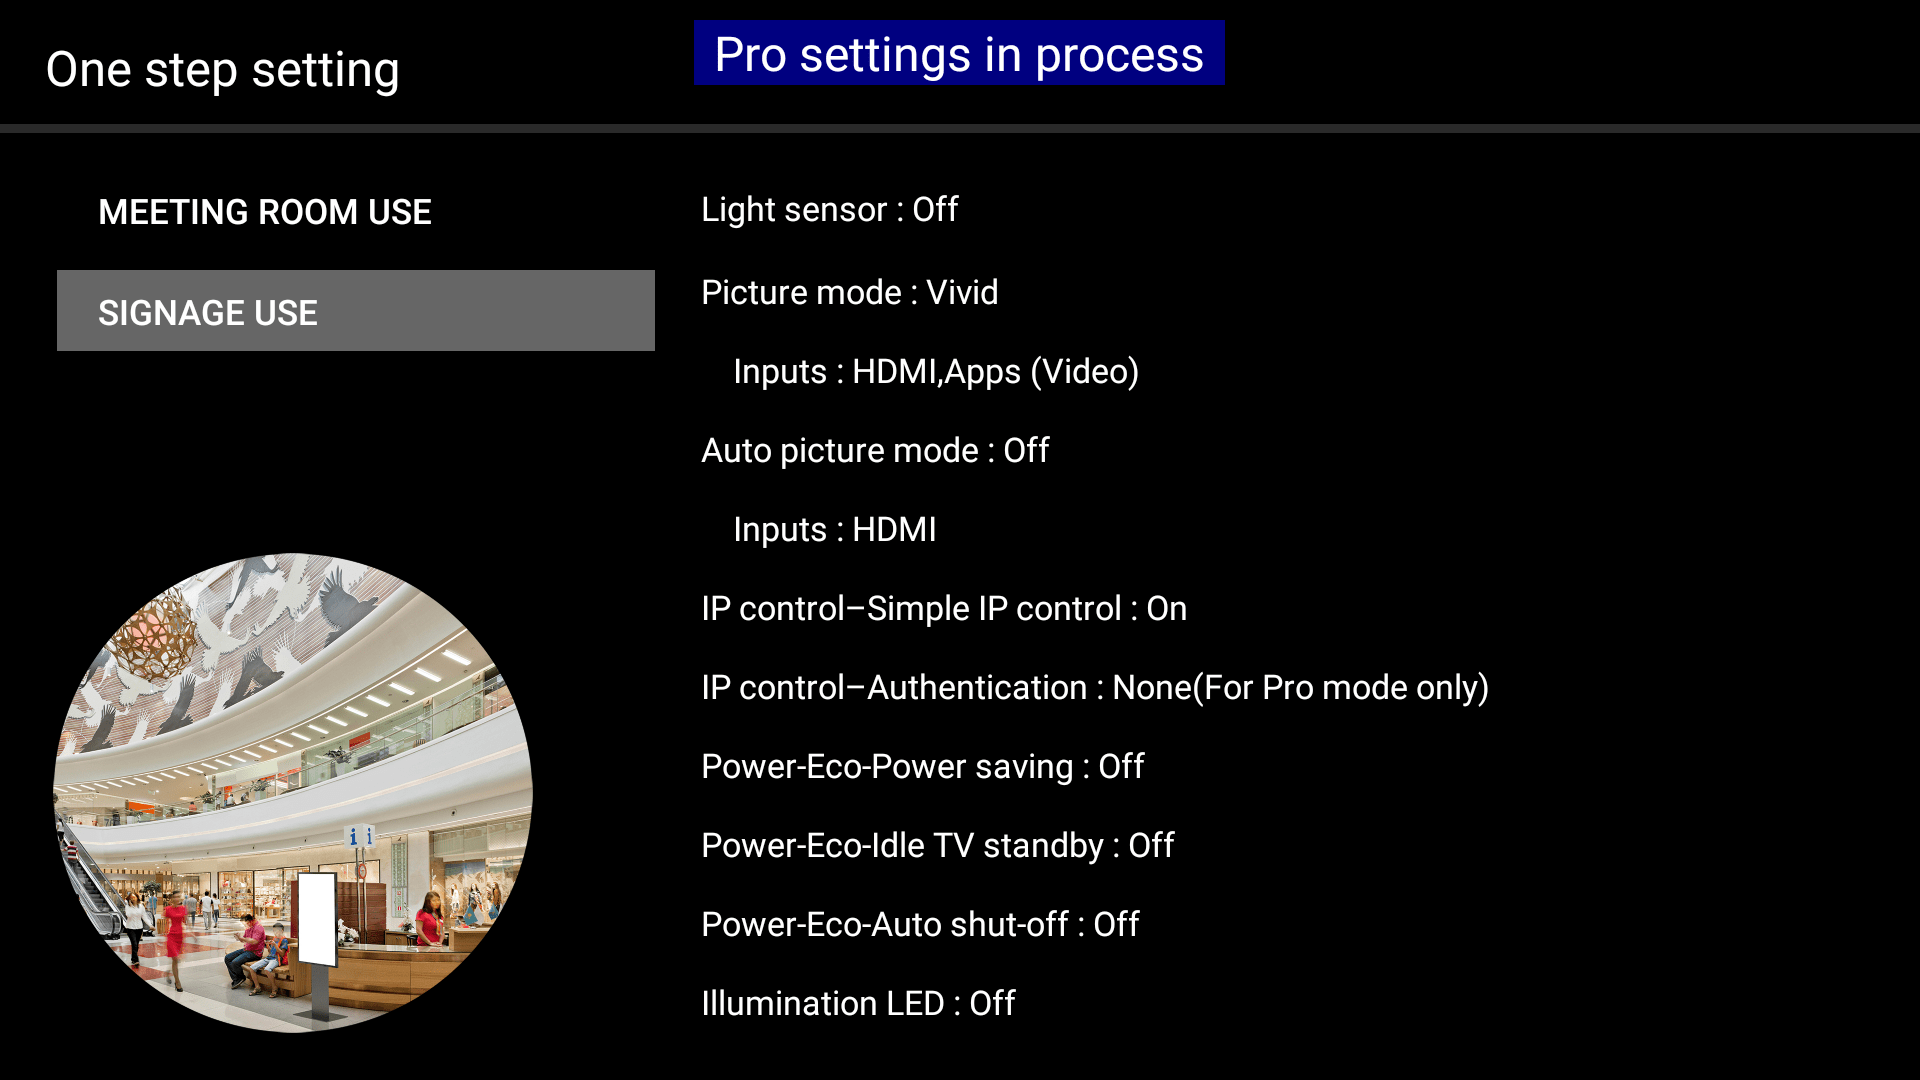
- This will automatically apply the Sony recommended settings for power management etc when using the screen for signage.
Enable API access
To make it possible for Smartsign to control power save, reboot and
other system functions you must configure API access in the display.
This is not critical, but recommended to take full advantage of the
display's functions.
- Decide on and make a note of which Pre-Shared Key (password) you would like to use. We recommend using the same for all if you have several. Newer devices require a minimum of 16 characters.
- Press [HOME] on the remote control to get to the home screen
- Navigate to Settings ⚙️ → Network & Internet → Remote device settings and Enable Control remotely
- Navigate to Settings ⚙️ → Network & Internet → Local Network → IP control
- If listed, Set Authentication to Normal and PreShared Key
- Set Pre-Shared Key to the password you decided in step 1, then press BACK on the remote
- Exit Settings
- The same Pre-Shared Key must be configured in Smartsign as well. This can be done either in the player settings after registering the screen or in the player profile (recommended, see FAQ).
Install Smartsign Android Player
- Download the Smartsign Android Player and place it on a USB memory stick
- Connect the USB stick the screen
- From the list of Apps, select PRO mode tool
- Change the mode to Pro settings mode and confirm
- "Pro settings in progress" will show at the top of the screen while you are in this mode
- On the Home screen, select ⚙ Settings (gear icon, top right)
- Select Pro settings
- Pro mode will ask for several permissions, select Allow on all
- Select Install APK (only visible with USB stick connected)
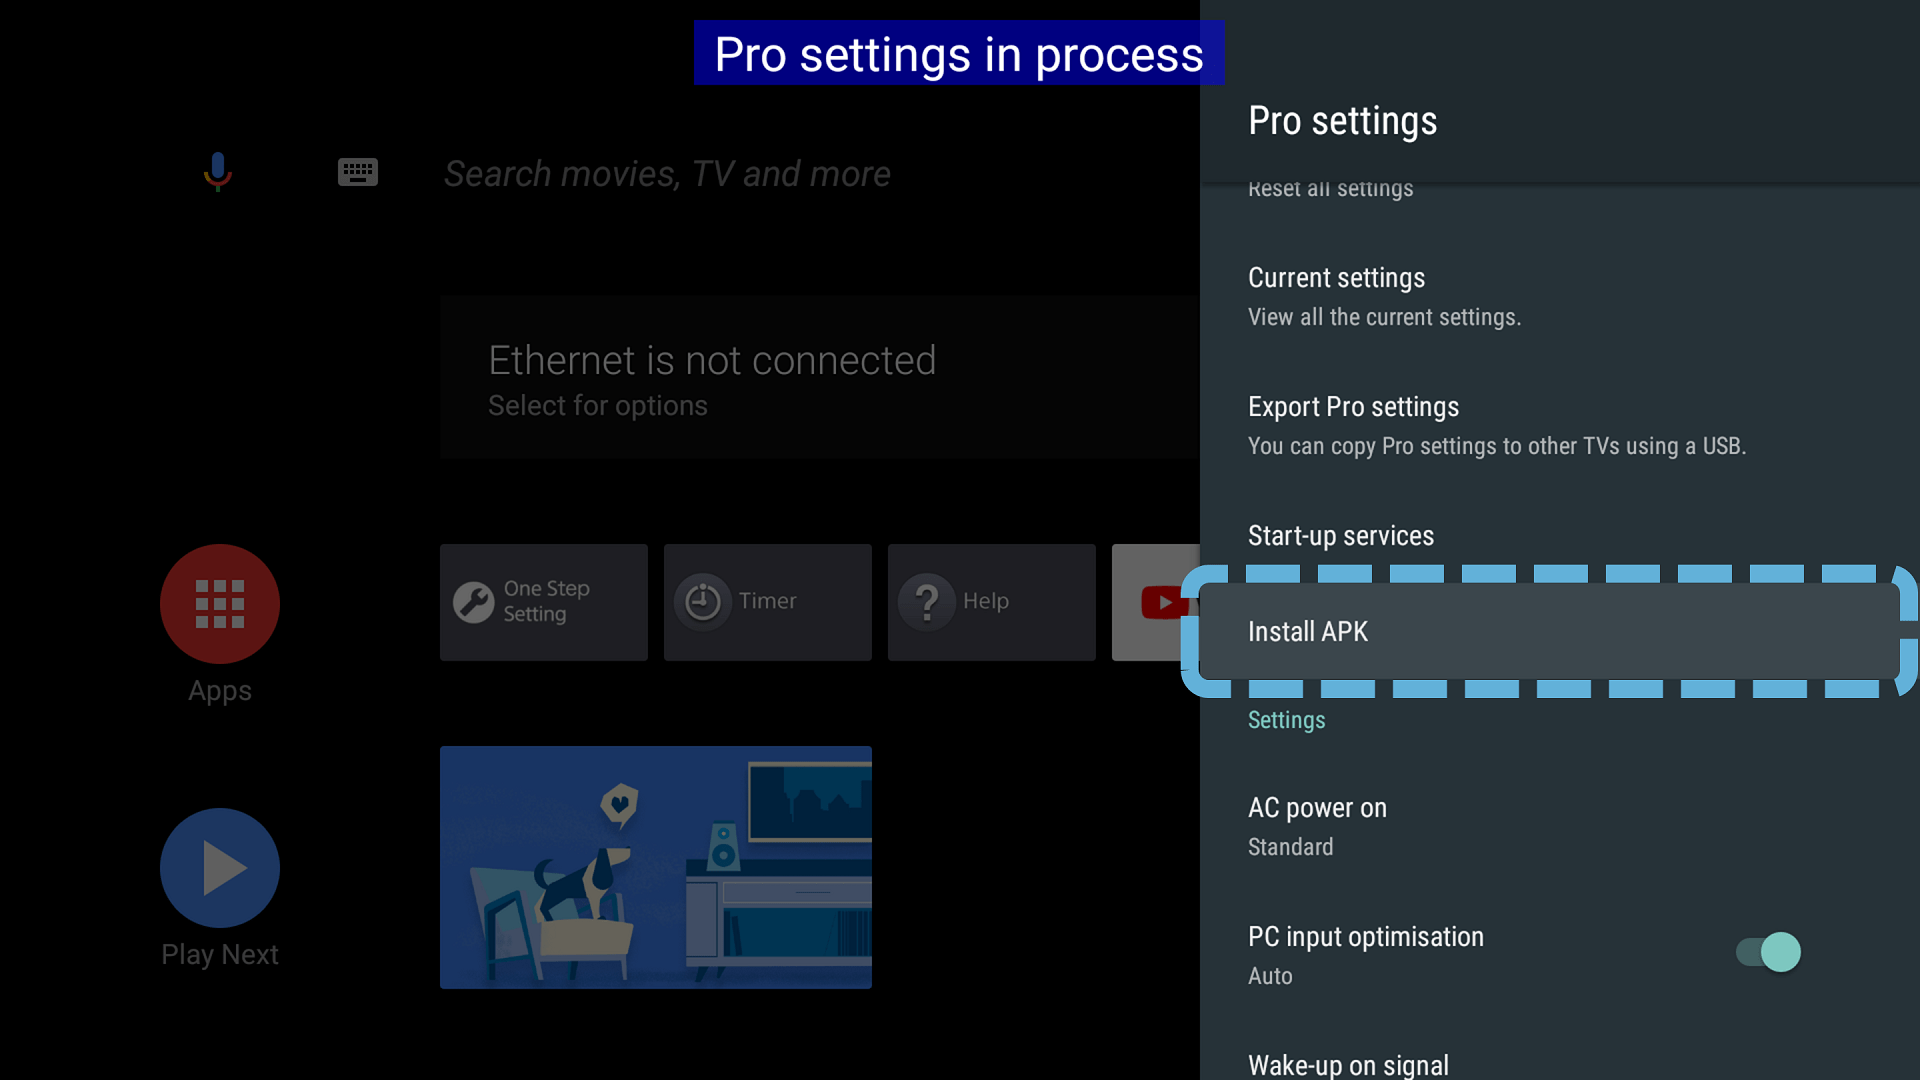
- Browse and select the Smartsign Android Player APK
- Select Install
- Select Open
- Approve permissions for Smartsign Android Player when asked
- Allow display over other apps for Smartsign Android Player
- Select Server Address and input your server, then click OK (hostname only)
- EU Cloud service: eu.smartsigncloud.com
- AU Cloud service: au.smartsigncloud.com
- On-premises: Use the hostname or IP that your server is configured with
- Exit
- The player should now launch and show a registration code after a few moments
- If you have not already configured API access, we recommend doing that as well, please see Enable API access above
- Once all settings are completed, exit Pro settings mode by switching to Normal mode
Portrait orientation
Version requirements
Minimum firmware version 6.7630 or later (released 2024-12-16).
Minimum Android Player APK 10.24.11 or later.
Android TV UI is not designed for portrait use. As such it will remain in landscape and rotation will be applied/restored automatically by the player on start/exit.
- With the player running, access the player configuration by pressing 1 2 3 4 on the remote
- Select Screen orientation
- Select Portrait
- For portrait orientation, also make sure to enable Use ExoPlayer on the player in Smartsign Publisher once it has been connected. This is necessary for proper video rotation.