Media library
The Media Library allows you to upload and share content with other users. Access to different sections and features may vary depending on your user profile.
For example, some users may be able to upload new media, while others may only have access to select from existing content.
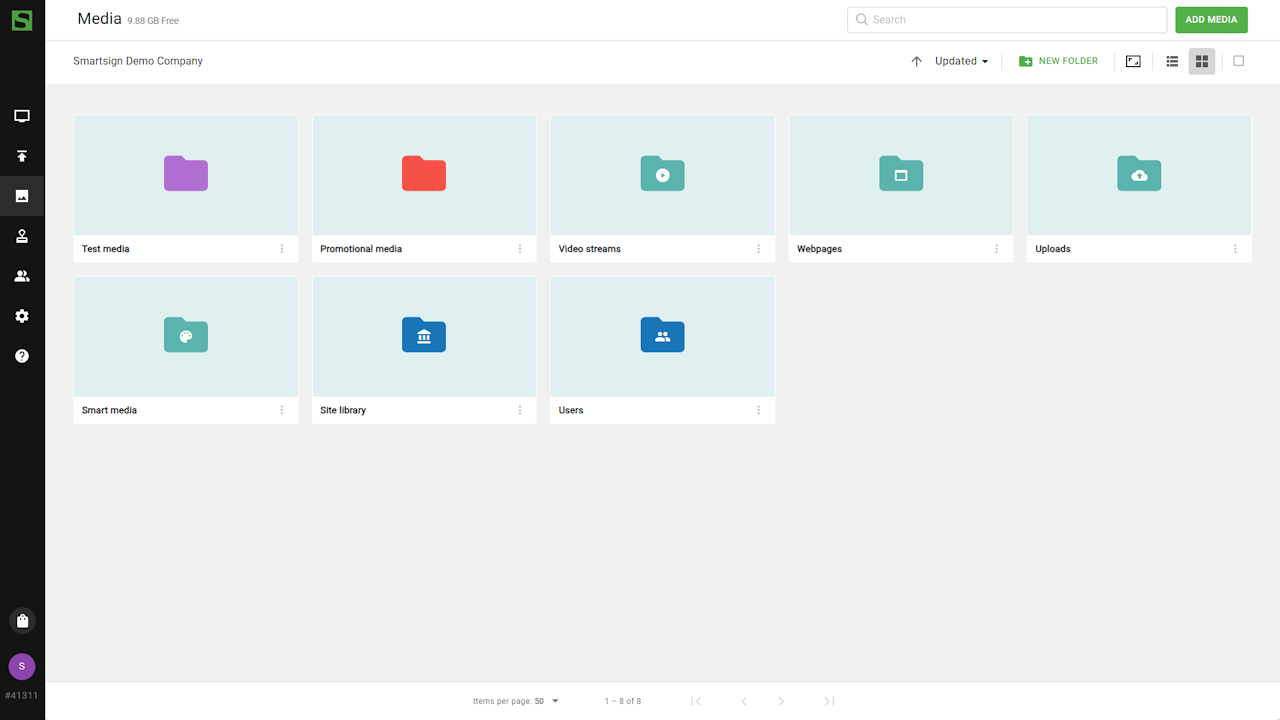
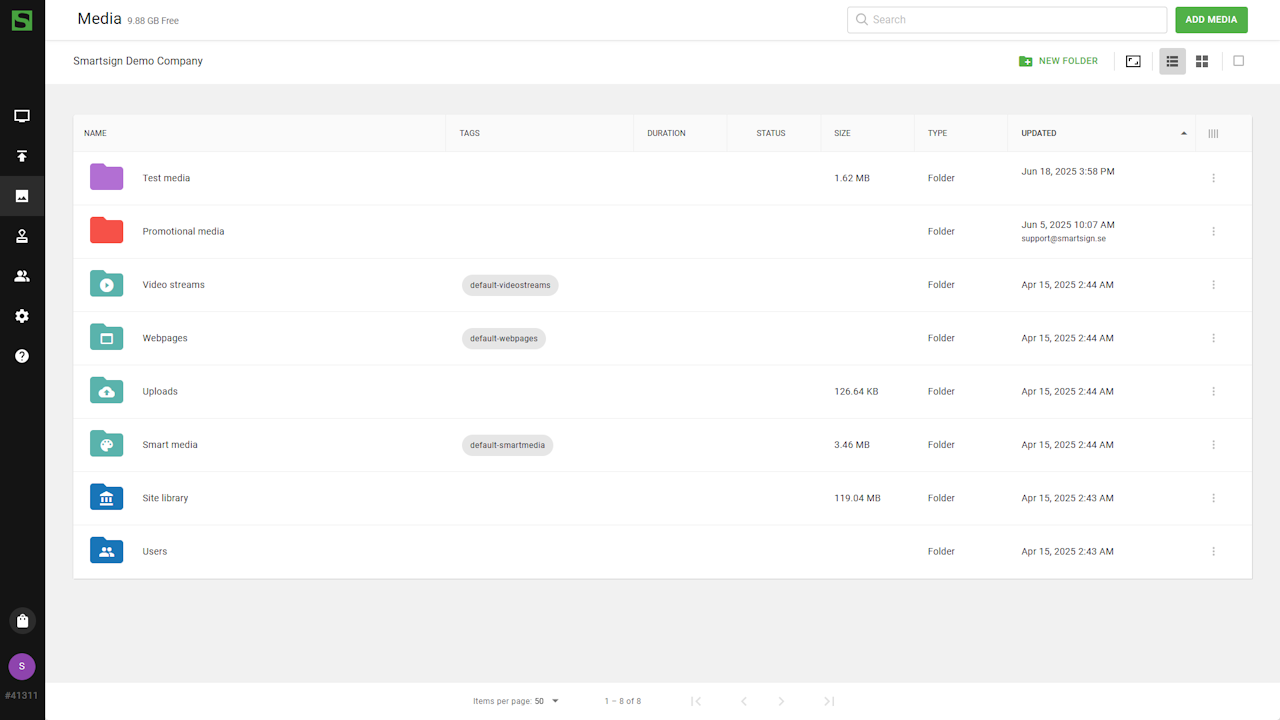
You can view the media library in grid view to see thumbnails of
each item, or in a list view with more details.
Folder types
There are several different folders in a default installation.
-
User folder
- The user folders contains the personal folder of each user. An admin will see all users here, but a publisher will only see their own folder.
-
Site root folder
- This is the default folder of your site. It has the same name as your site. Shared media items and sub-folders are placed here.
-
Other folders
- In addition to the folders listed above you may also have folders with templates, sample content and other custom folders. Some of these folders may be synchronized from a shared source either within Smartsign, from an external file system.
Upload content
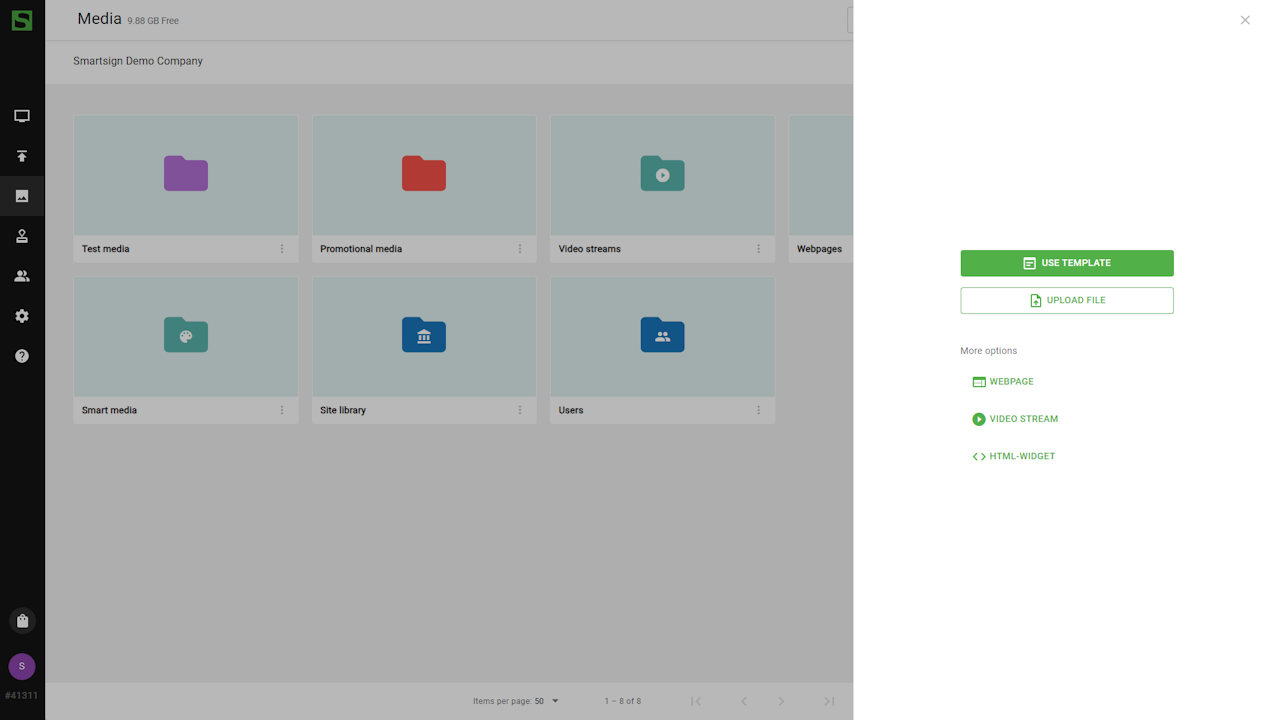
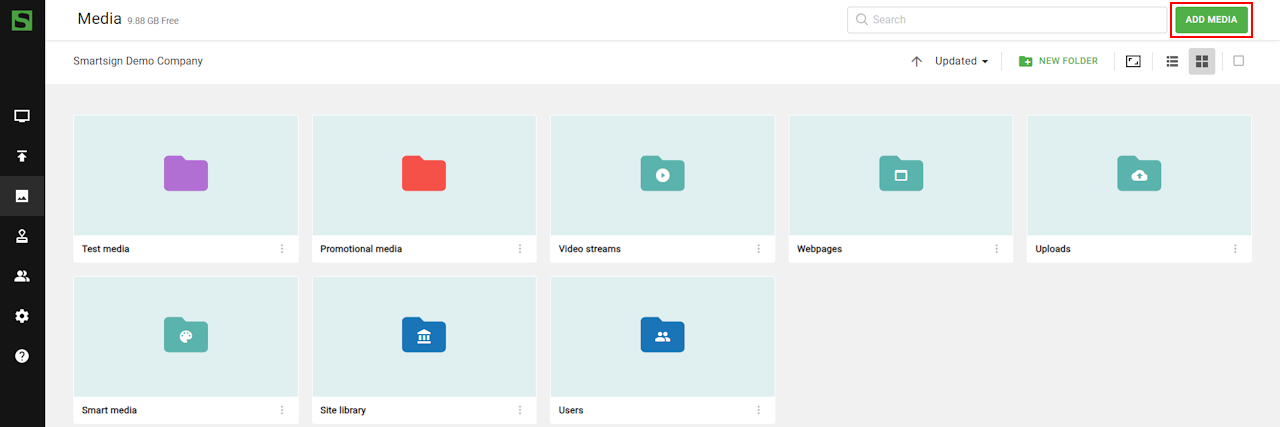 Click add media in the top menu to upload media items.
You will be presented with a dialog where you can choose if you
want to create content based on Smartsign templates or upload
files from different sources like your own computer or online sources.
It's also possible to drag and drop files to the media library. You can upload to the current folder or a subfolder by dropping the content on the folder that you want to upload to.
Create new folder
To create a new folder, you should first place yourself in the folder where you want to create it. Then you click New folder. A prompt will appear where you can enter the desired name of the folder.
You can set user & group access directly when you create the folder.
Folder permissions
As an admin, you will always see all folders in the Media library, however a normal user will need to be given explicit access.
To modify permissions, follow steps below.
- Select the folder that you want to modify.
- Click the options button and select details.
- Go to users & groups tab.
- Add users or groups to any of the following permissions.
- Read - Can only copy items from folder.
- Write - Can only add items in folder
- Modify - Full access, can add and remove content from folder.
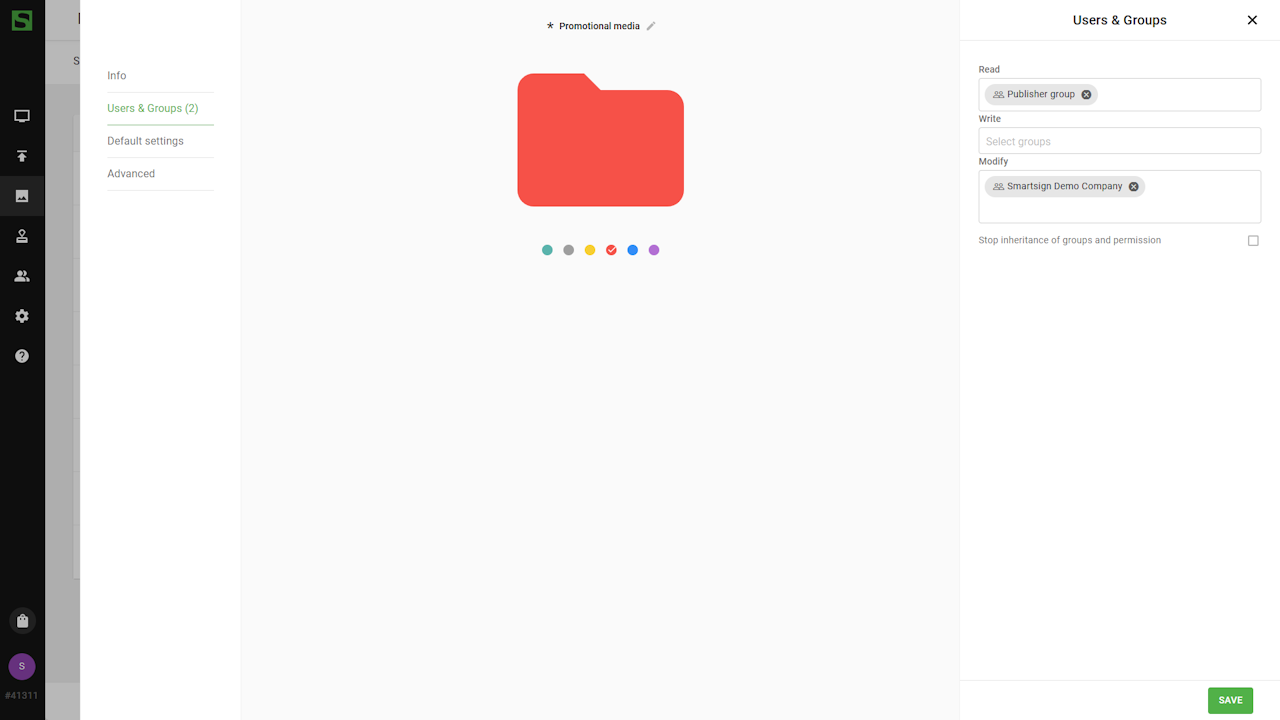
Normally, permissions will be inherited downwards in the folder structure, but you have the option of stopping this so that you can have a different set of permissions lower in the structure.
To do this, just enable the setting "Stop inheritance of groups and permission" on the folder. After that you can set different permissions on the folder which will only apply to that folder and the ones below it. Change on any higher-level folder will no longer apply to this folder or the ones below it.
Media validity
It's possible to limit the validity of media to a specific period.
- Select options button on an item and go to details.
- Go to validity tab.
- Set the date and time you want for the media.
- You can combine settings or use individually as per your needs.
- Save to confirm changes.

The time referred to is the local time of each screen. The media can still be added to bookings and will also remain in any previous bookings, but it will be automatically excluded from the actual playlists that are sent to screen if it's not valid.
Media that is currently invalid will appear grayed out in the media library as well as in any playlist using it.
Replacing files in the media library
You can replace media in the media library to quickly change a booked media item instantly without the need of opening a booking to remove and add new content.
- Start by locating the media in the media library.
- Select the option button and click replace in the menu. You will be presented with a dialog where you can choose a file to replace the media item.
- The media item will be replaced and all bookings using it will use the new version automatically.
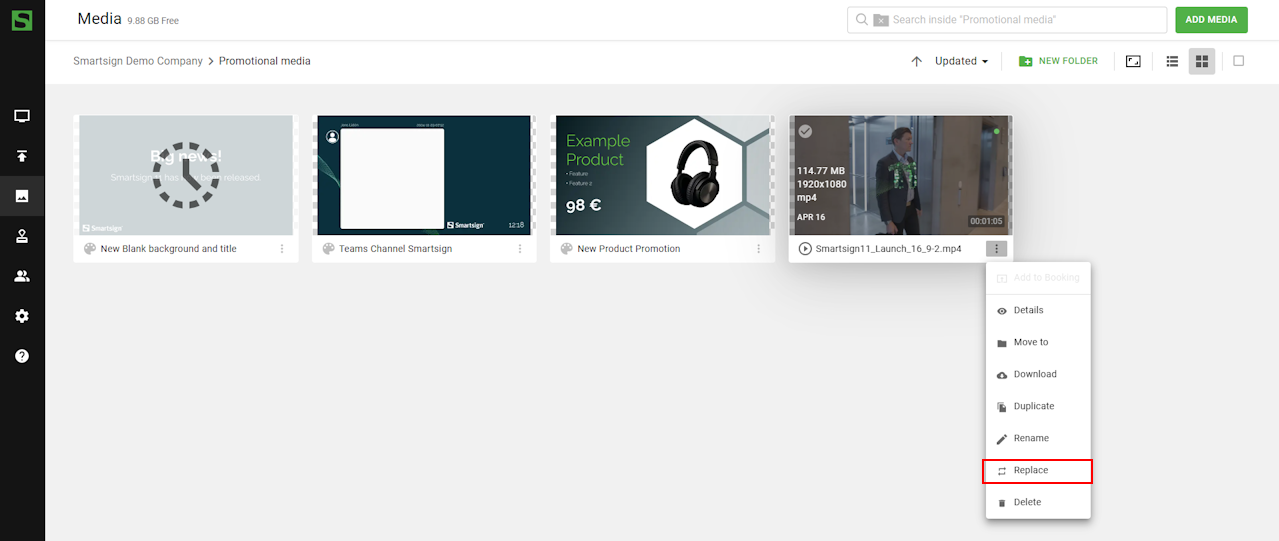
It's also possible to replace a file by uploading a file with the same name as an existing. You will then be automatically prompted if you wish to replace it.