AD Setup
Follow the below instructions to integrate your on premises Smartsign server with Active Directory.
Server requirements
- Smartsign Server version 10.24 or higher.
- Server must be configured to use SSL/TLS (https).
Licensing
Using Active Directory (AD) integration requires a valid Support- and Upgrades agreement (SMSUP) for all licenses.
Setup overview
- Create and configure an application group in Active Directy Federation Services (ADFS)
- Map AD groups to relevant sites and user profiles in Smartsign
- Configure and Enable AD authentication in Smartsign Server (Smartsign Identity)
- Configure auto-provisioning for users from your AD (Optional)
- Map AAD groups to Smartsign groups to control resource permissions (screens, media etc) from AD (Optional)
- If any setting or button referenced is missing after you enable AD, please refresh your browser window.
Configure Active Directory Federation Services (ADFS)
Create an application group
In Server Manager, navigate to AD FS Management and create a new application group:
- In the console tree, select Application Groups and choose Add Application Group from the Actions list.
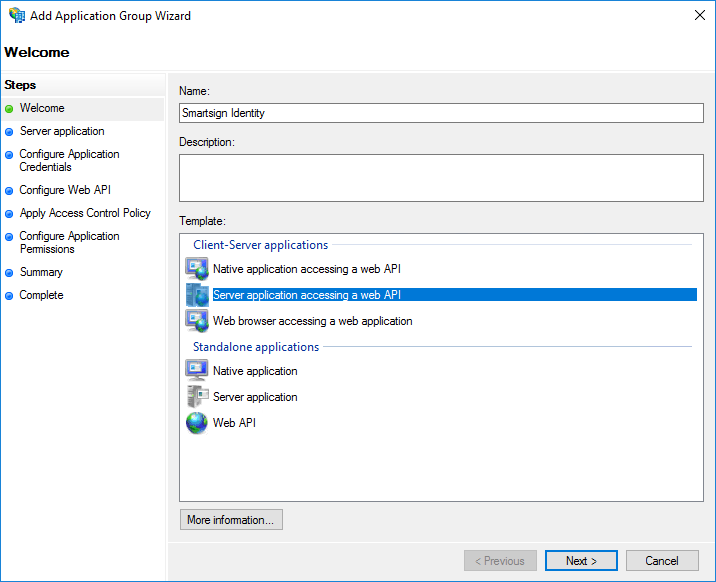
- On the Welcome screen of the wizard, input a Name and choose the Server application accessing a web API template.
- On the Server application screen:

- Give the Server application a Name.
- Take note of the Client Identifier. You will need it later.
- Specify Redirect URIs. This should be the URL to your Smartsign server followed by the below suffixes:
/id/signin-adfs(example: "https://smartsign.example.com/id/signin-adfs")/id/signout-adfs/id/signout-callback-adfs
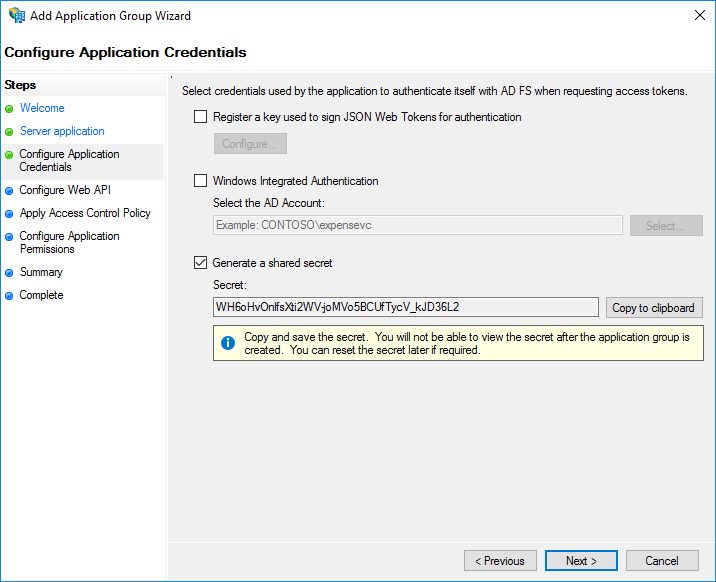
- On the Configure Application Credentials screen, select *Generate a shared secret".
Take note of the Secret, you will need it later.
- On the Configure Web API screen:
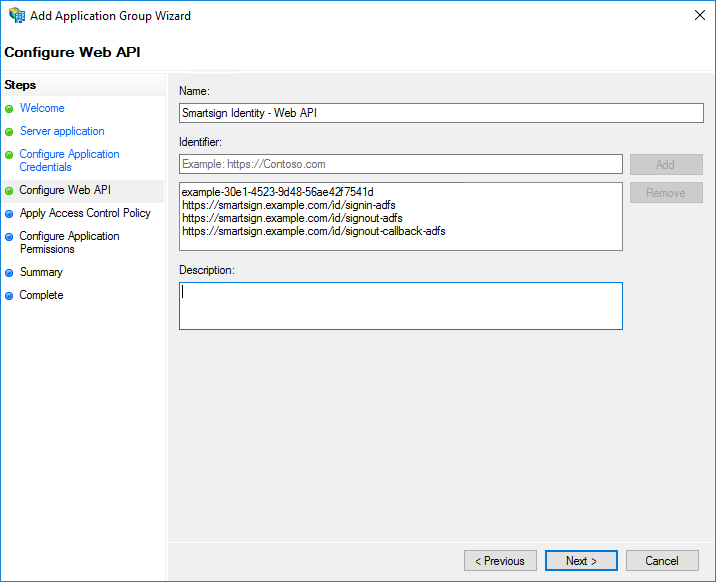
- Give the WEB API a Name
- Add the Client Identifier and Redirect URIs to the list of Identifiers.
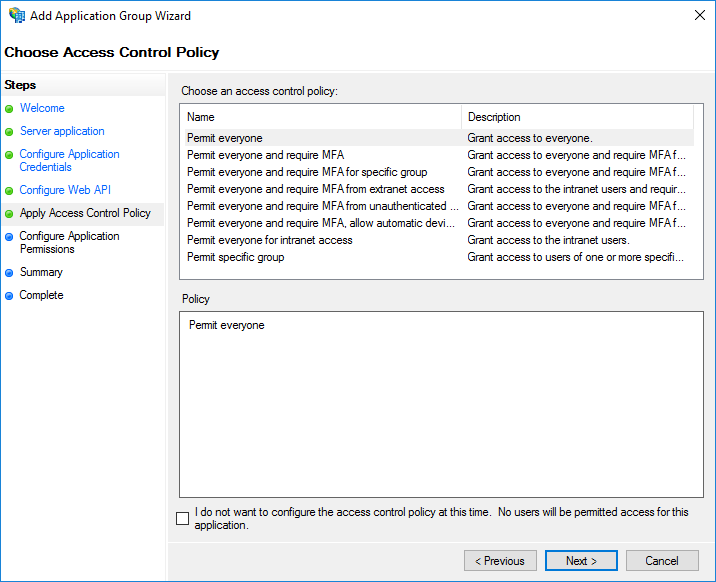
- On the Apply Access Control Policy screen, set an appropriate Access Control Policy for the Application Group.
- On the Configure Application Permissions screen, Select the following in Permitted scopes:

- allatclaims
- openid
- profile
- Finish the Add Application Group Wizard
Add Issuance Transform Rules
In Server Manager, navigate to AD FS Management and edit the created application group:
- In the console tree, select Application Groups.
- In the Application Groups list, right-click the created application group and select Properties.
- In the Applications section, choose the Web API and select Edit.
- Navigate to the Issuance Transform Rules tab
- Add a rule:
- On the Choose Rule Type screen, select Send LDAP Attributes as Claims.
- On the Configure Claim Rule screen:

- Give the rule a Claim rule name
- Select Attribute store: Active Directory
- Add the following mappings:
- Display-Name --> Name
- E-Mail-Addresses --> E-Mail Address
- Token-Groups - Unqualified Names --> Group
tip
You can decide if you want to use group names or group SIDs to map groups in Smartsign.
Using group names is intuitive, but may be limiting in a more complex environment.
To use group SIDs, replace the above group mapping with this: Token-Groups as SIDs --> Group - Select Finish
- Add a rule:
- On the Choose Rule Type screen, select Send Claims Using a Custom Rule.
- On the Configure Claim Rule screen:

- Give the rule a Claim rule name
- Input the following text to the Custom rule:
=> issue(Type = "email_verified", Value = "true"); - Select Finish
- Select OK to finish
Enable Active Directory authentication for Smartsign Server
- On the server, find Smartsign Server Installer - Advanced Settings in the start menu and launch it
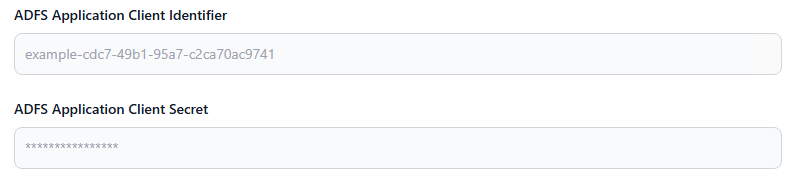
- Input the following configurations:
- ADFS Application Client Identifier
- Application Client Secret
- ADFS Service URL (the service url of your ADFS server)

- Use the Test Service URL button to test that it's valid
- Save the settings
- Smartsign needs to be restarted for the settings to apply. You can do so directly from the Server Installer by clicking Restart Smartsign
- Wait until Smartsign is up and running again
- Login to Smartsign Publisher with an Admin account
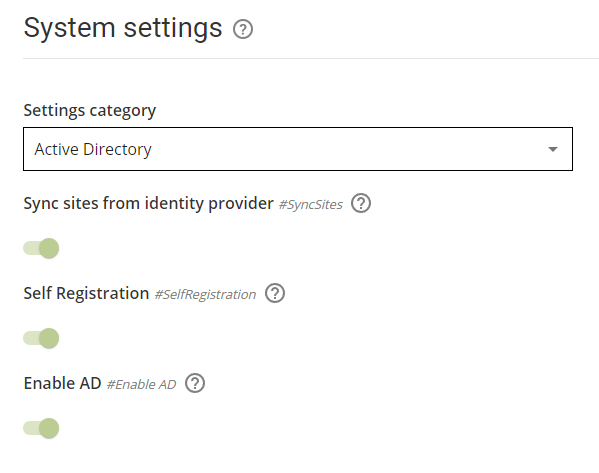
- Open Management → System → System settings
- Select the Active Directory settings category
- Configure the settings as follows:
Setting Value Description Enable AD True/False Enables or disables Active Directory integration Self registration True/False True: Authenticated users are automatically registered and linked in Smartsign (recommended)
False: Users must manually link an existing Smartsign user to their Azure AD credential
Sync sites from identity provider True/False True: Site access will be synchronized with AD every login (recommended)
False: Site access will only be synchronized the first time a new user signs in (at self registration)
- Click Save, AD integration is now enabled and will appear as an option on the login page.
- Done, Active Directory authentication is now enabled
Configure access for auto-provisioning (optional, recommended)
-
If you want to use auto-provisioning, we now need to determine which users should be allowed to sign in using AD and have their users created automatically.
If you haven't already, please prepare the necessary AD security groups in accordance with the Planning section.
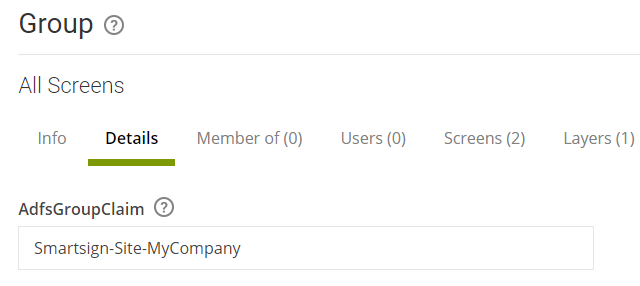
For this example we will use the following example groups:Group name Smartsign-Site-MyCompany Smartsign-Permissions-Publisher Smartsign-Permissions-SiteAdmin -
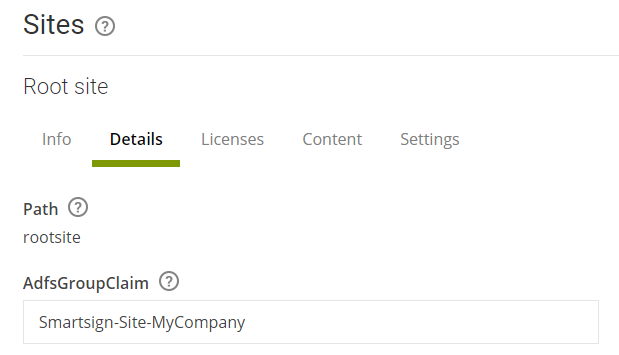
As an Admin, in Publisher, go to Management → Sites and view the site that you wish to configure.
-
In AdfsGroupClaim, provide the name of the AD group that should give access to the site (or group SID for alternative configuration)
-
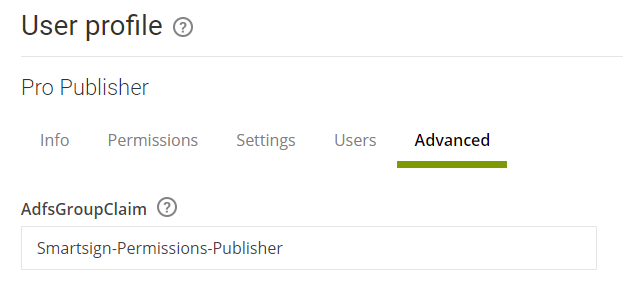
Go to Management → Users → User profiles and view each user profile that you want to use with AD.
Connect it to the relevant AD group by providing the name of each AD group in AdfsGroupClaim (or group SID for alternative configuration).
Then click Save.

-
Users with the relevant groups should now be able to login using their AD credentials.
-
Done!
Manage resource access using Active Directory (optional)
Access Groups are used to control access to resources, such as screens,
media library folders etc, for all non-admin users.
These can either be managed directly in Smartsign or mapped to Active
Directory (AD) groups to control resource access from AD.
- Create or identify the AD security groups to use for access control in Smartsign.
- Find and note the name for each group (or group SID for alternative configuration)
- Create the corresponding groups in Smartsign and input the AD Group name to connect it to the AD group.
- Assign which resources the group should provide access to.
- Done! Users will be automatically added/removed from the groups each login, based on the AD group memberships.